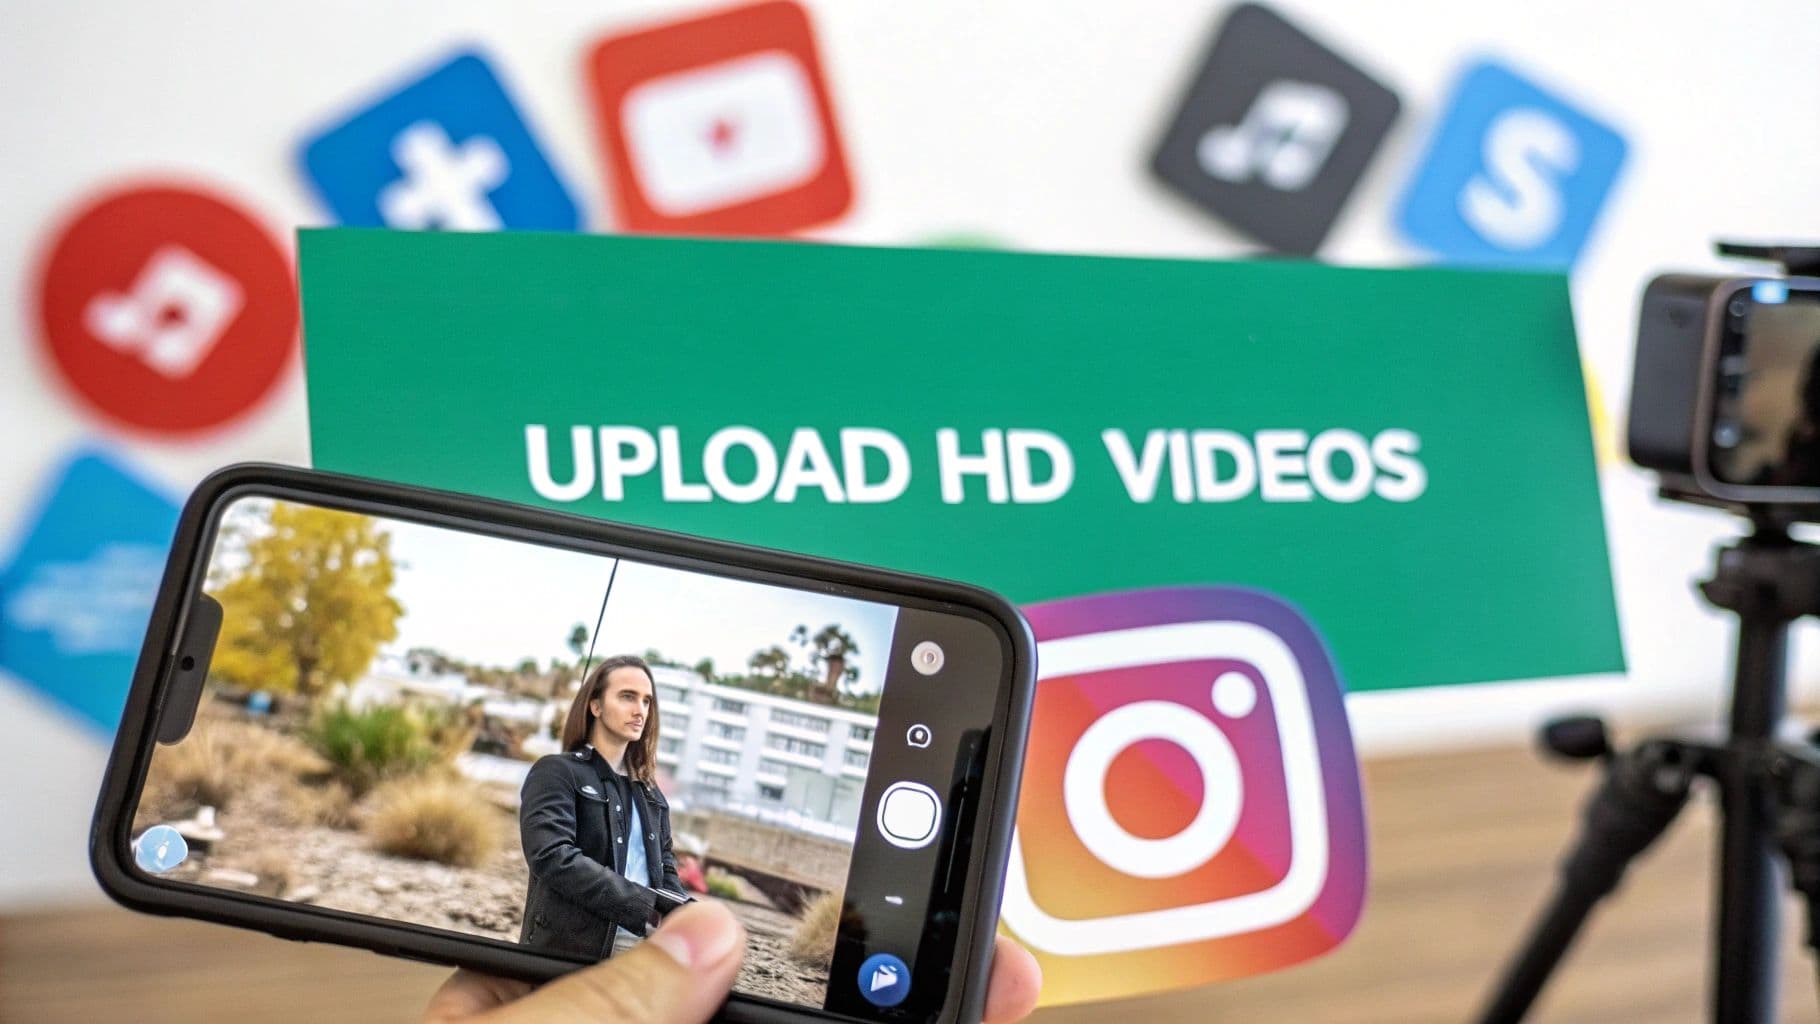
Why Your Instagram Videos Look Blurry

If you've ever felt this pain, you're definitely not alone. The main culprit here is how Instagram handles the massive amount of content uploaded every single second. To keep the platform running smoothly for everyone, it automatically shrinks video files to save server space and make sure they load quickly, even on slower connections.
This process becomes a problem when your video doesn't match Instagram's ideal settings. If the file is too large or in the wrong format, the algorithm has to do some heavy lifting. It resizes, reformats, and recompresses your file, and that’s where the noticeable drop in quality happens.
Common Triggers for Quality Loss
So, what exactly makes Instagram's compression algorithm kick into overdrive? It usually comes down to a few common missteps:
Incorrect Aspect Ratios: Trying to upload a widescreen video to a vertical format like Reels forces Instagram to either crop or stretch it, which instantly degrades the image.
High Bitrates: A high bitrate is great for your original file because it holds more detail. But for Instagram, it’s a huge red flag that signals the need for heavy compression.
Unsupported File Formats: Sticking to the recommended MP4 format with an H.264 codec is crucial. Anything else can cause errors during the upload process.
Mastering this is more critical than ever. Think about it: videos now account for over 60% of the time people spend on Instagram. And according to recent Instagram marketing statistics, a staggering 76% of marketers see it as the social platform with the highest ROI. Quality content is clearly a winning strategy.
> The secret to beating the algorithm is to do the work for it. If you pre-optimize your video to meet Instagram’s specs before you upload, you give it less to compress. The result is a much sharper, cleaner video that looks the way you intended.
Once you get why your videos are losing quality, you’re in the perfect position to learn how to stop it from happening.
Nailing Your Camera and Export Settings
Great video quality doesn't start when you hit "share." It starts way before that, right in your camera and editing software. If you get these foundational settings right from the beginning, you’re basically telling Instagram’s compression algorithm to take a step back.
Here's a pro tip many of us use: shoot in a higher resolution than you plan to post. For instance, recording in 4K (3840 x 2160 pixels) and then downscaling to 1080p when you export creates a noticeably sharper image than just shooting in 1080p. This technique, called oversampling, crams more detail into every frame, giving your final video a crisp, high-end look.
Getting Your Export Settings Just Right
After you’ve finished editing, the export phase is make-or-break. This is where you either prep your video perfectly for Instagram's feed or set it up to be squashed by compression. It doesn't matter if you're using Adobe Premiere Pro, DaVinci Resolve, or Final Cut Pro; the goal is always the same: give Instagram a file that's as close to its ideal specs as possible.
This infographic lays out the whole workflow perfectly.
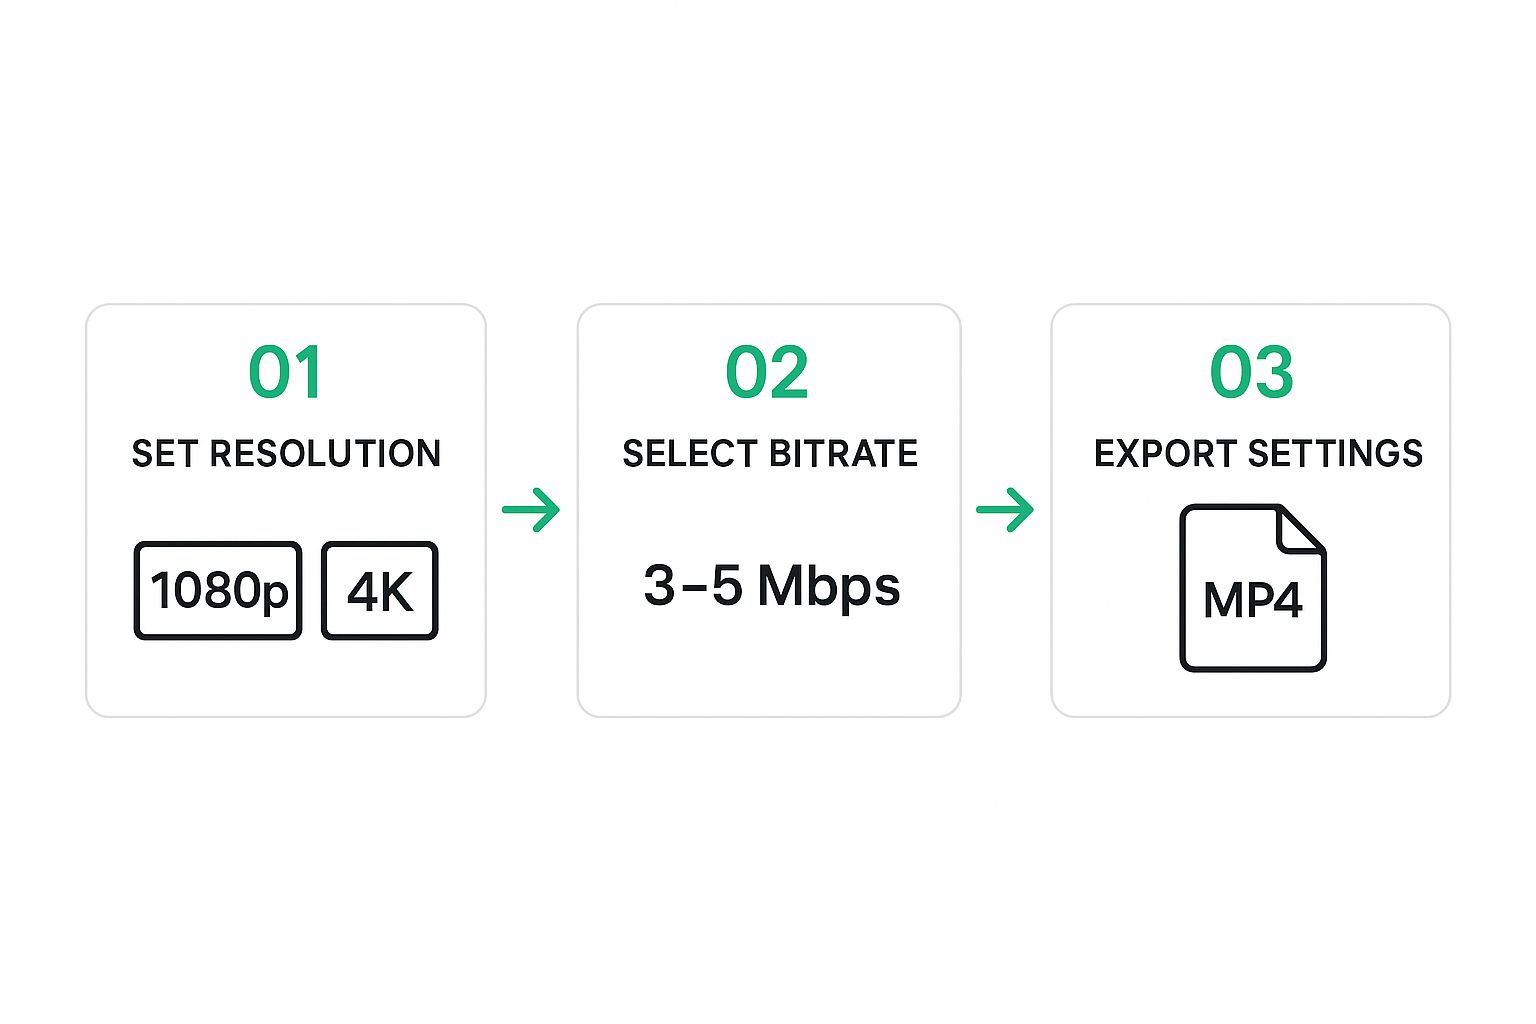
As you can see, the key is to balance the right resolution with the optimal bitrate and file format. You want to hand Instagram a file it barely needs to process. The less re-encoding it has to do on its end, the more of your original quality shines through. Honestly, mastering this is a huge part of learning how to upload high-quality videos on Instagram.
To make it even easier, here is a quick reference table with the settings I use to get the best results.
Optimal Instagram Video Export Settings
For both Reels and Stories, the recommended codec is H.264 (AVC), with a resolution of 1080 × 1920 pixels. The frame rate should be 30 fps, and the bitrate should be set to VBR, 2 pass, with a target bitrate between 3–5 Mbps. The audio codec should be AAC, and the audio sample rate should be 48 kHz.
For Feed Posts, the recommended codec is also H.264 (AVC). The resolution can be 1080 × 1350 pixels (4:5 ratio) or 1080 × 1080 pixels (1:1 ratio). Like Reels and Stories, the frame rate should be 30 fps, with a VBR, 2-pass bitrate, and a target bitrate of 3–5 Mbps. The audio codec should be AAC, and the audio sample rate should remain at 48 kHz.
Stick to these parameters, and you'll be giving Instagram a video file that's already optimized, which dramatically reduces the chances of its algorithm ruining your hard work.
Choosing the Right Upload Method

The final hurdle in getting your video onto Instagram is the upload itself. This is where all your careful editing and exporting can get undone in an instant. A poor transfer can introduce a whole new layer of compression, so let's make sure that doesn't happen.
First, let’s talk about what not to do. The most common mistake I see is people sending their final video file to themselves through apps like WhatsApp or Messenger. Don't do it! These platforms are designed to save data, and they do that by aggressively compressing your video, completely ruining its quality before you even get to Instagram.
File Transfers That Preserve Quality
To keep your video looking sharp, you need a transfer method that doesn't compress your file. The goal is to get the same file you exported from your computer onto your phone, bit for bit.
Here are the best ways to do that:
For Apple Users: AirDrop is your best friend. It’s fast, wireless, and moves the original file over without touching the quality. It's the most seamless option if you're in the Apple ecosystem.
For Android and Cross-Platform: Your go-to solution is cloud storage. Use a service like Google Drive or Dropbox. Just upload the video from your computer, then open the app on your phone and download it directly to your device.
If you want a quick refresher on the basics, you can check out this guide on the general Instagram video uploading process.
> Crucial Tip: Before you upload anything, pop into the Instagram app and go to Settings and privacy > Media quality. You absolutely must have the "Upload at highest quality" option toggled on. This setting tells the app to take it easy on your file, but it can only do its job if you provide a high-quality video in the first place.
And one last thing: always upload over a stable Wi-Fi connection. A spotty cellular signal can cause the upload to hang or, even worse, trigger Instagram to apply extra compression to get the file through.
Optimizing for Reels, Stories, and Feed Posts

Getting your video uploaded in high quality is a great start, but it's only half the job. You have to make sure it's actually optimized for where it's going to live on Instagram. A one-size-fits-all approach just doesn't work here; a video meant for Reels won't land the same way in Stories or on your main feed.
Think of each placement as its own unique platform. They all have different technical specs, but more importantly, people use them differently. Someone scrolling through Reels is in a different mindset than someone tapping through their friends' Stories. If you ignore that, even the most polished video can completely miss the mark.
Tailoring Your Content for Each Placement
The most obvious—and most critical—difference is the shape of the video. Reels and Stories are designed for that full-screen, vertical experience. You absolutely need to stick to a 9:16 aspect ratio (1080x1920 pixels). Anything else gets slapped with ugly black bars or gets awkwardly cropped, which is a dead giveaway of low-effort content to both viewers and the algorithm.
Feed posts give you a bit more breathing room. You can still use the classic 1:1 square, but I always recommend a vertical 4:5 aspect ratio (1080x1350 pixels). Why? It simply takes up more screen space as someone scrolls, making it much harder to ignore than a simple square.
> Pro Tip: I always tell people to film with the final destination in mind. If you know it's going to be a Reel, keep the most important action right in the center of that vertical frame. If it's a 4:5 feed post, make sure your key subject won't get their head chopped off when you crop it.
This is especially crucial for Reels, which have become an absolute juggernaut for discovery. Projections show that by 2025, over 2 billion users will be watching Reels every month. The format is taking over, with the average Instagram feed now made up of 38.5% Reels content. This isn't just a trend; it's a massive shift in how people use the app.
Strategic Differences Beyond the Specs
The technical side is one thing, but the strategy is another. How you approach each format should be completely different. A great starting point is learning how to use https://www.gainsty.com/blog/how-to-use-instagram-stories-for-business effectively, which is a totally different game than creating Reels.
Here’s a simple way I break it down for clients:
Reels: This is your engine for growth. The goal is to get discovered by people who don't follow you yet. Your content here should be entertaining, shareable, and designed to grab attention in the first three seconds.
Stories: This is where you connect with your current audience. It’s for the casual, behind-the-scenes stuff. Use interactive features like polls and Q&As to build a real community.
Feed Videos: These are the polished, permanent pieces that live on your profile. Think of them as your brand's highlight reel—they should represent the best of what you offer.
Once your video is edited and ready to go, brushing up on how to create compelling Instagram Reels can make a huge difference in how far your content travels. By putting in the extra effort to customize your video for each placement, you're not just making it look better—you're giving it the best possible chance to succeed.
Pro Tips for Crystal-Clear Video
Getting your export settings right is a huge part of the battle, but there are a few other pro-level tricks that can make a massive difference in how your videos look once they're live on the 'gram.
Think of it this way: you want to give Instagram's algorithm a file that's already so clean and detailed that it doesn't have to work very hard to compress it. Less compression means fewer ugly artifacts.
The single most powerful tool you have for this is good lighting. It's not just about making things visible. Bright, well-lit scenes are packed with visual information and have fewer noisy shadows—and those shadows are exactly what compression algorithms love to crush into blocky, pixelated messes.
Sound and Color: The Unsung Heroes of Quality
Don't sleep on your audio quality. It sounds strange, but clean, crisp audio can actually trick our brains into perceiving the video itself as being higher quality. It's a neat psychological hack that gives your content an instant professional sheen.
The same goes for your color grade. Try to avoid overly dark or muddy color schemes. When footage doesn't have enough contrast, Instagram's compression tends to blend similar dark tones, which wipes out subtle details. A little boost in contrast and saturation can make a world of difference, helping your visuals stand out.
> With over 2.14 billion monthly active users, a huge number of whom are under 34, your video needs every advantage it can get to grab their attention on a small screen. You can dig into more Instagram user demographics on Analyzify.com to see just who you're creating for.
Finally, when you're in your video editor's export menu, always look for the VBR 2-pass setting. This tells your software to analyze your footage twice. It intelligently gives more data to the complex, fast-moving parts of your video and saves it on the simpler, static shots. This is the gold standard for balancing file size with quality, and it’s a non-negotiable step for anyone serious about creating professional Instagram Reels for business or simply scaling their personal brand.
Common Questions & Quick Fixes
Even when you follow all the best practices, a few tricky issues can still pop up. I've seen these questions come up repeatedly, so let's address them.
Is There a Difference Between Uploading from iPhone vs. Android?
There used to be a noticeable gap here. For years, the consensus was that the iOS app handled video uploads better, often resulting in slightly crisper quality.
That said, the Android app has improved dramatically. Today, the most crucial factor isn't your operating system; it's the quality of the original file and making sure you've enabled high-quality uploads in your Instagram settings. Don't sweat the iPhone vs. Android debate—focus on your source file.
Why Does My Video Look Blurry After I Post It?
You hit publish, watch your video, and it looks great… for the first few seconds. Then, it suddenly turns into a pixelated mess. What gives?
This is usually just a processing lag. Instagram shows a low-quality preview while it works on the full-resolution version in the background. However, if the video stays blurry long after you’ve posted it, the problem is likely your bitrate. If it was way too high, Instagram's compression algorithm had to work overtime, and the result is a low-quality file.
> My Advice: Always give your video at least 5-10 minutes after posting before you panic. If it’s still not sharp, go back to your export settings and aim for a bitrate closer to the 3-5 Mbps sweet spot.
Can I Upload a 4K Video to Instagram?
Technically, yes, you can upload a 4K file. But should you? No.
Instagram is built for 1080p playback, and it will aggressively compress and downscale any 4K video you throw at it. The platform just isn't optimized for that resolution.
Here's a pro-tip, though: filming in 4K is still a great idea. When you record in 4K and then export your final edit at 1080p, you're using a technique called oversampling. This essentially crams more detail into the 1080p file, making it look incredibly sharp and crisp, even after Instagram does its thing.
So, film in 4K, but always export in 1080p.
Ready to stop guessing and start growing? Gainsty uses advanced AI and expert strategies to help you gain real, engaged followers organically. Grow your Instagram presence safely and effectively. Get started with Gainsty today!

.png&w=1920&q=75&dpl=dpl_5vvnEneLD2DAfKTSR86kjNKSWjSC)


.png&w=750&q=75&dpl=dpl_5vvnEneLD2DAfKTSR86kjNKSWjSC)